Played around with Python and TravisCI on a cabin trip this weekend, learning more about Continuous Integration, automatic builds and testing of code each time a change is committed to version control. Letting us enable the “fail-fast” paradigm for application development and its iterative development approach. Since Continuous integration is all about continuous delivering of small chunks of code, which improves team productivity, helps fix bugs quickly before release, testing branches before pull request and a long the deployment phases.
In the project I created an simple application using Python Virtualenv for the environment isolation, then created a GitHub repository, then linked it to TravisCI. To test and learn more about continuous builds. You can see the project below.
Creating the application
The structure of code looks like this:
app/
├── __init__.py
├── src
│   ├── app.py
│   ├── __init__.py
└── tests
    ├── app-test.py
    └── __init__.py
.gitignore
.travis
__init__.py
README.md
The app.py is the source of the application and the app-test.py is the test case and the __init__.py files are empty. These is only required to make Python treat the directories as containing package; by preventing directories with a common name, such such as string, from unintentionally hiding valid modules that occur later on the module search path.
The .gitignore file contains the following:
# Byte-compiled / optimized / DLL files
__pycache__/
*.py[cod]
*$py.class

# C extensions
*.so

# Distribution / packaging
.Python
build/
develop-eggs/
dist/
downloads/
eggs/
.eggs/
lib/
lib64/
parts/
sdist/
var/
wheels/
pip-wheel-metadata/
share/python-wheels/
*.egg-info/
.installed.cfg
*.egg
MANIFEST

# PyInstaller
#  Usually these files are written by a python script from a template
#  before PyInstaller builds the exe, so as to inject date/other infos into it.
*.manifest
*.spec

# Installer logs
pip-log.txt
pip-delete-this-directory.txt

# Unit test / coverage reports
htmlcov/
.tox/
.nox/
.coverage
.coverage.*
.cache
nosetests.xml
coverage.xml
*.cover
.hypothesis/
.pytest_cache/

# Translations
*.mo
*.pot

# Django stuff:
*.log
local_settings.py
db.sqlite3

# Flask stuff:
instance/
.webassets-cache

# Scrapy stuff:
.scrapy

# Sphinx documentation
docs/_build/

# PyBuilder
target/

# Jupyter Notebook
.ipynb_checkpoints

# IPython
profile_default/
ipython_config.py

# pyenv
.python-version

# celery beat schedule file
celerybeat-schedule

# SageMath parsed files
*.sage.py

# Environments
.env
.venv
env/
venv/
ENV/
env.bak/
venv.bak/

# Spyder project settings
.spyderproject
.spyproject

# Rope project settings
.ropeproject

# mkdocs documentation
/site

# mypy
.mypy_cache/
.dmypy.json
dmypy.jso
# Pyre type checke
.pyre/
Creating the working environment
In my setup I used PowerShell for all the command handling as you probably will notice a long the way. For the application environment, we need to create a working folder:
Creating the Project directory
PS C:\>New-Item -Name C\:user\username\source\repos\CI_With_Python_TravisCI -ItemType Directory -Force
When the project directory is created, we continue to create an isolated environment using Python Virtualenv
PS C:\>pip install virtualenv
When the Python Virtual Environment is installed, we need to create a Virtual environment. This is done by typing:
NOTE: These will only work for Windows users.
INFO: The venv parameter is just the name of the Virtual Environment, and can be called whatevery you decide.
PS C:\> C:\Python35\Python -m venv C:\user\username\source\repos\CI_With_Python_TravisCI\venv
Then we need to activate the environment, this is done by typing:
NOTE: You need to set the ExecutionPolicy to AllSign or RemoteSign to allow script from the internet to be executed.
PS C:\> C:\user\username\source\repos\CI_With_Python_GitHub_TravisCI\venv\Scripts\activate.ps1
When the project is activated, we need to create the files and folders we need, I used the Command Line to create the resources first, then added the content/code.
The creation of resources from the code structure above from the PowerShell window:
# Setting the location to my Virtual Envionment folder, to avoid typing long filepaths.
Set-Location -Path C:\YourPathToTheVirtualEnvFolder

# Creating app folder
PS C:\MyVenvPath> New-Item -Name app -ItemType Directory -Force

# Creating the src and tests directories
PS C:\MyVenvPath>New-Item -Name src -Path .\app\ -ItemType Directory -Force
PS C:\MyVenvPath>New-Item -Name tests -Path .\app\ -ItemType Directory -Force

# Creating app.py and app-test.py
PS C:\MyVenvPath>New-Item -Name app.py -Path .\app\src\ -ItemType File -Force
PS C:\MyVenvPath>New-Item -Name app-tests.py -Path .\app\tests\ -ItemType File -Force

# Then we need to add the __init__.py files in each directory
PS C:\MyVenvPath>New-Item -Name __init__.py -Path .\ -ItemType File -Force
PS C:\MyVenvPath>New-Item -Name __init__.py -Path .\app\ -ItemType File -Force
PS C:\MyVenvPath>New-Item -Name __init__.py -Path .\app\src -ItemType File -Force
PS C:\MyVenvPath>New-Item -Name __init__.py -Path .\app\tests -ItemType File -Force
Then we can start adding the code for the application. A simple application that only return the sum of two numbers:
# app.py
def add_numbers(num1, num2):
    return num1 + num2
Creating Unit Test
Then in order to test the application I created a set of test scenarios, using Python unittest
# app-test.py
import unittest
from app.src.app import add_numbers

class MyTest(unittest.TestCase):
    def test_add_numbers(self):
        self.assertEqual(add_numbers(1, 1), 2)
        self.assertEqual(add_numbers(1, -1), 0)
        self.assertEqual(add_numbers(0, 0), 0)
        self.assertEqual(add_numbers(-1, -1), -2)
        self.assertEqual(add_numbers(1.0, 1), 2)
        self.assertEqual(add_numbers(1.1, 1.1), 2.2)
        self.assertEqual(add_numbers(40, 2), 42)

if __name__ == '__main__':
    unittest.main()
In the test code, I’ve tested different scanarios that may occur, for instance summing up:
- Two integers
- Two floating numbers
- One floating and one integer
- One negative and positive integer
Trying to learn best practice by think of the best possible scenarios and then implement test cases to reduce the number of bugs.
To execute the test cases use:
PS C:\MyVenvPath\app\tests>python .\app-test.py
If the test runs without problems, it looks something like this:
.
----------------------------------------------------------------------
Ran 1 test in 0.000s

OK
Otherwise, it may look like this:
======================================================================
FAIL: test_add_numbers (__main__.MyTest)
----------------------------------------------------------------------
Traceback (most recent call last):
  File ".apptestapp-test.py", line 16, in test_add_numbers
    self.assertEqual(add_numbers(1,1), 3)
AssertionError: 2 != 3

----------------------------------------------------------------------
Ran 1 test in 0.000s

FAILED (failures=1)
Declare dependencies
When using a programming language to develop an application, you usually need to install libraries. This is the case for Python and therefore we need to declare our dependencies. This is done in the requrements.txt file using the command:
pip freeze > requirements.txt
This may look like something like this:
astroid==2.2.0
autopep8==1.4.3
colorama==0.4.1
isort==4.3.9
lazy-object-proxy==1.3.1
mccabe==0.6.1
pycodestyle==2.5.0
pylint==2.3.0
six==1.12.0
typed-ast==1.3.1
virtualenv==16.4.3
wrapt==1.11.1
This is an important step to remember.
Defining Continuous builds with travis.yml file
Now that the application is almost set up, we need to create a travis.yml configuration file for the Travis CI workflow. This file will tell Travis CI all the details need.
In this file you can customize your build environment and add the set of steps. Travis uses .travis.yml file in the root of the directory to learn about your project environment, how you want your builds to be executed, what kind of tests to be executed, and other information such as email, Campfire and IRC rooms to notify about build failures.
In this project the travis.yml file looks like this:
NOTE: The file must be named .travis.yml, I didn’t get my builds to work when I called in .travisci.yml
# travis.yml
language: python
python:
  - "3.5"
# command to install dependencies
install:
  - pip install -r requirements.txt
# command to run tests
script:
  - export PYTHONPATH=$PYTHONPATH:$(pwd)
  - python app/tests/app-test.py
Creating a GitHub repository
Now that we are finished with the code, Travis CI configuration, we need to create a GitHub repository and link the Travis CI to GitHub account in order to import the project. Create your GitHub repository at your account at https://github.com/.
git init
git add .
git commit -m "Initial commit"
# Remember to change to it's real value if you are following along.
git remote add origin <remote repository URL>
git push origin master
Setting up Travis CI
To set up Travis CI with GitHub go to https://travis-ci.com/ and Sign in with GitHub.
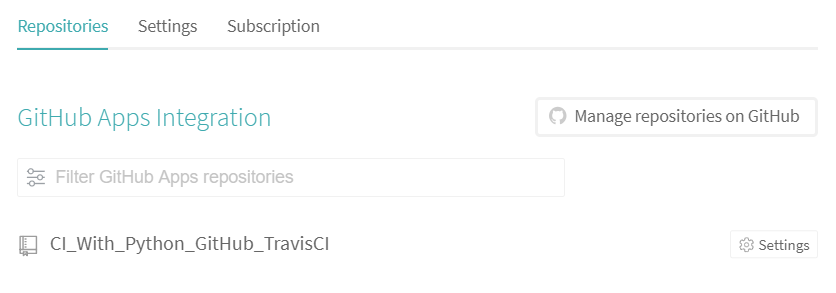
When logged in to Travis CI, go to your Profile and you will see a list of all your public repositories as default (At least it happened to me the first time) or you can choose to use Manage repositories on GitHub where you can specify which project you want to add to Travis CI.

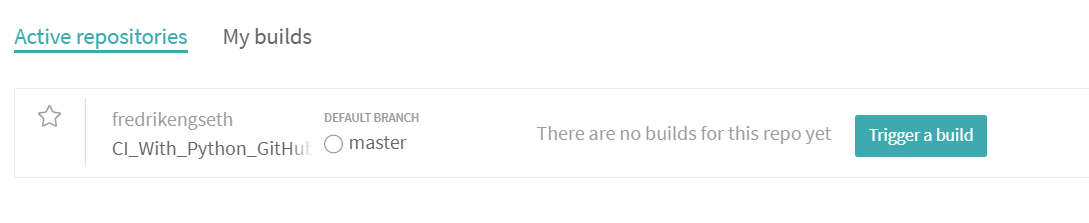
When Travis is installed, you can go to the Dashboard and trigger a build.
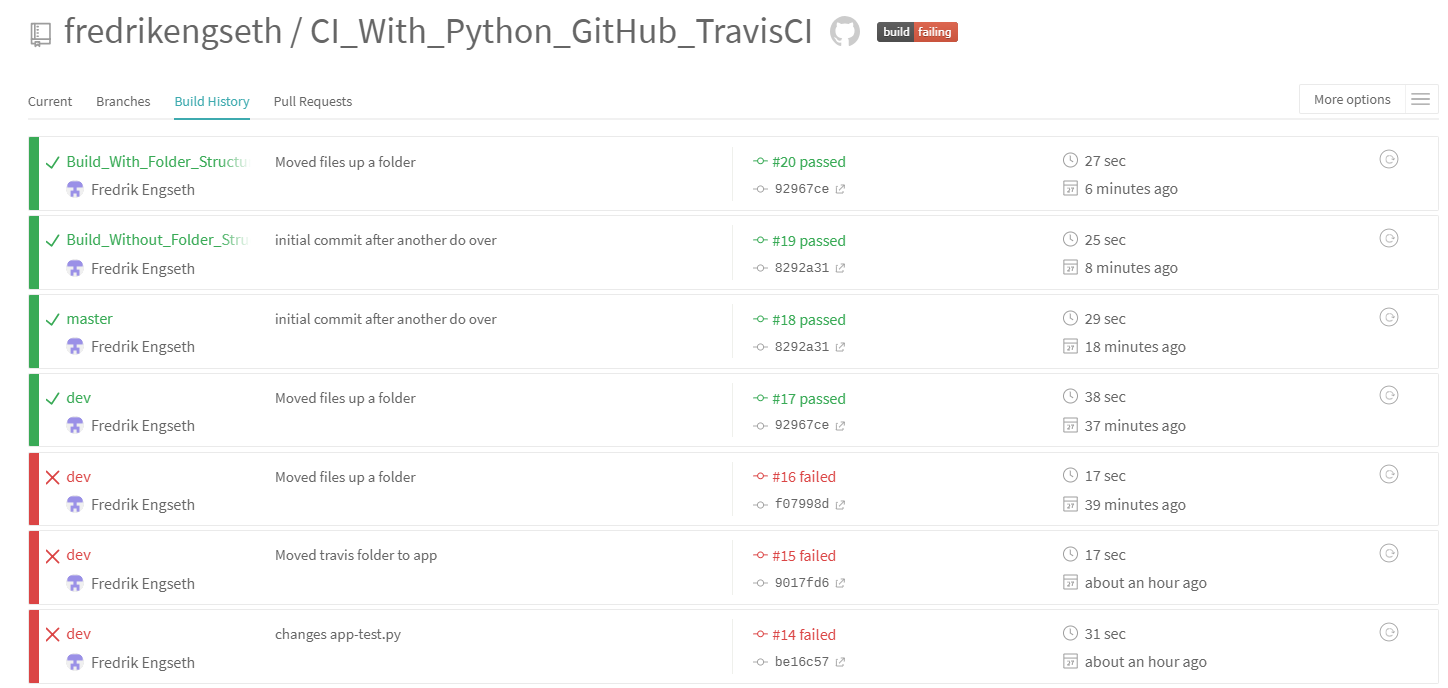
The cool thing now is that on each new commit, a build will start automatically and you will be notified on email on the status.
Here is an extraction of my build commit. As you can see, I have four different branches, this is because I struggled with getting the builds in Travis to work. First I tried to create a branch/build without any folder structure of the code, which worked fine. On the other hand when I tried to add folder structure, the unit tests run fine locally but, not on the build server.
I tried different approaches using Ubuntu on Windows to create the Python Virtual Environment and tested the same with PowerShell, deleted and recreated the project multiple times. Until I realize I had added the setup of files and folders in a wrong way.
Now I have a branch named Build_With_Folder_Structure which is same as the branch Dev and a Build_Without_Folder_Structure same as the master branch.
At least I figured it out, took me three evenings… to find out a trivial problem like this..
The cool thing is that for each branch, commit and pull request you make a new build is triggered.
Managing Pull Request
Furthermore, if you work on different branches than the master, which is often the case when developing new features, fixing bugs, issues etc or like me struggling with a problem and creates different branches to test different cases. Then you need to make a pull request then merge your code.
For instance, creating a dev branch.
# Creates a new branch
git checkout -b dev
# Adds changes to dev branch
git add
git commit -m "initial commit dev branch"
git push origin dev
Once you added your modifications in the dev branch, Travis CI will trigger a new build for the dev branch and will notice you if the build succeeded or failed. If the build succeeds you can make a pull request to the master branch, knowing it builds successfully.
Wrap up
To wrap up, this was a fun little cabin project in between food, drinks, skiing- and snowboard sessions. Hope you enjoyed it!
For More Content See the Latest Posts
- Speeding Up Power Automate: Replacing ‘Append to Variable’ with ‘Compose’ for Efficient Workflows
 Discover how replacing ‘append to’ variables with ‘compose’ actions in Power Automate can drastically speed up your flows.
 - Why and How to Implement DevOps?
 Discover how to implement DevOps for faster software delivery, improved quality, and better team collaboration.
 - Quick Tip: Show and Hide Option Set Options in Dynamics 365 with JavaScript
 Learn to dynamically manage Option Set options visibility in Dynamics 365 forms, enhancing UI and user experience in just a quick read.
 - Understanding Dynamics 365 Customer Service Components: Key Features and Benefits
 Learn the concepts of Dynamics 365 Customer Service: Boost satisfaction with case management, knowledge bases, and multi-channel support.