
Introduction
Have you tried to limit the number of rows you want to return from related tables in Dataverse using Power Automate? Like using the top parameter to get the number of rows you want in FetchXML or directly in the Dataverse action, this works fine. Let’s say, you want to get the three latest activities from the timeline on a case in Dynamics CE and give a notification to the customer or the caseworker about these activities. To specify the number of rows from a related table is not available in FetchXML or the Dataverse action. To solve how we can limit the number of rows returned from a related table we can use the Dataverse List rows action, its Expand Query parameter, and the Odata filter. We take a look at this in this post.
Table of content
- Prerequisites
- Setting up an environment
- Use case for listing related table rows
- Creating a Power Automate to list timeline activities
- Conclusion
Prerequisites
- Familiar with Power Automate.
- Familiar with JSON objects.
- Visual Studio Code is installed. It can be downloaded here Visual Studio Code.
Setting up an environment
To create a Dynamics 365 CE trial environment you can follow the steps in the post, How to create Microsoft Dynamics 365 Customer Engagement Trial instance?.
Use case for listing related table rows
If we take a look at the example above. Where we have activities on the timeline of a case like in the image below. We want to list the three latest activities from the timeline. In the image below we can see a case with multiple (four) activities in the timeline. In the next section we look at how we can create a Power Automate flow to list these activitities and specify how many of them we want to list.

Creating a Power Automate to list timeline activities
In this section we look at the steps to create a flow for listing the timeline activities regarding a case.
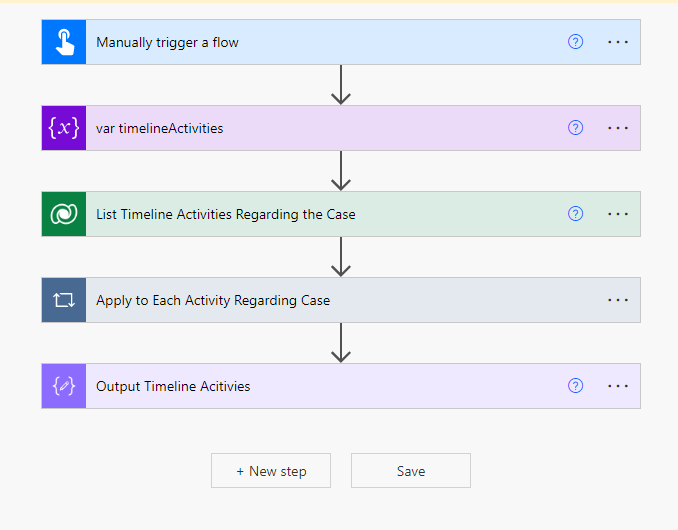
Step 1: The first step is to create a new cloud flow. For this example, we create an instant cloud flow so that we can trigger it manually and easier for testing. The overall flow looks like this, and we go through the details onwards.
Step 2: After creating a manully trigger flow we create a string variable that will hold the values of the timeline activites. In this example, we make a list cointaing the subject, activity type and created on date. So that we can use it for instance to send a notification to update workers or customers with the latest activities on their case.

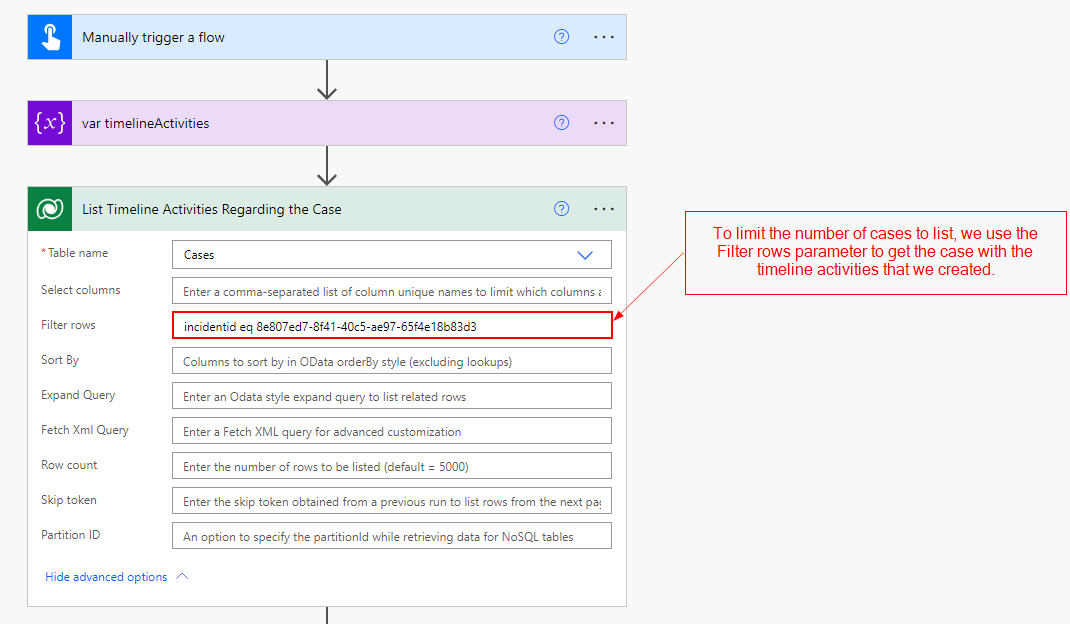
Step 3: After the variable is created we want to list the case and the related timeline activities using the Dataverse List Rows action.

For testing purposes we can use the Filter rows parameter to get the case that has the timeline activities we want to get. This will return a single record and it’s easier to test with and read the output from the action.
Step 4: After testing the flow and look at the output we we can see the data of the case. To get the related rows from the timeline we need to look for the Navigation Property for the Activity Pointers table. We will use this in the Expand Query parameter to list the related activities. After the flow has run click on the Show raw outputs button on the action, and this opens a side pane with the case data in JSON format. When the pane opens scroll down until you find the property Incident_ActivityPointers as you can see in the image below. This will be used in the next step for to retrieve the timeline activities.

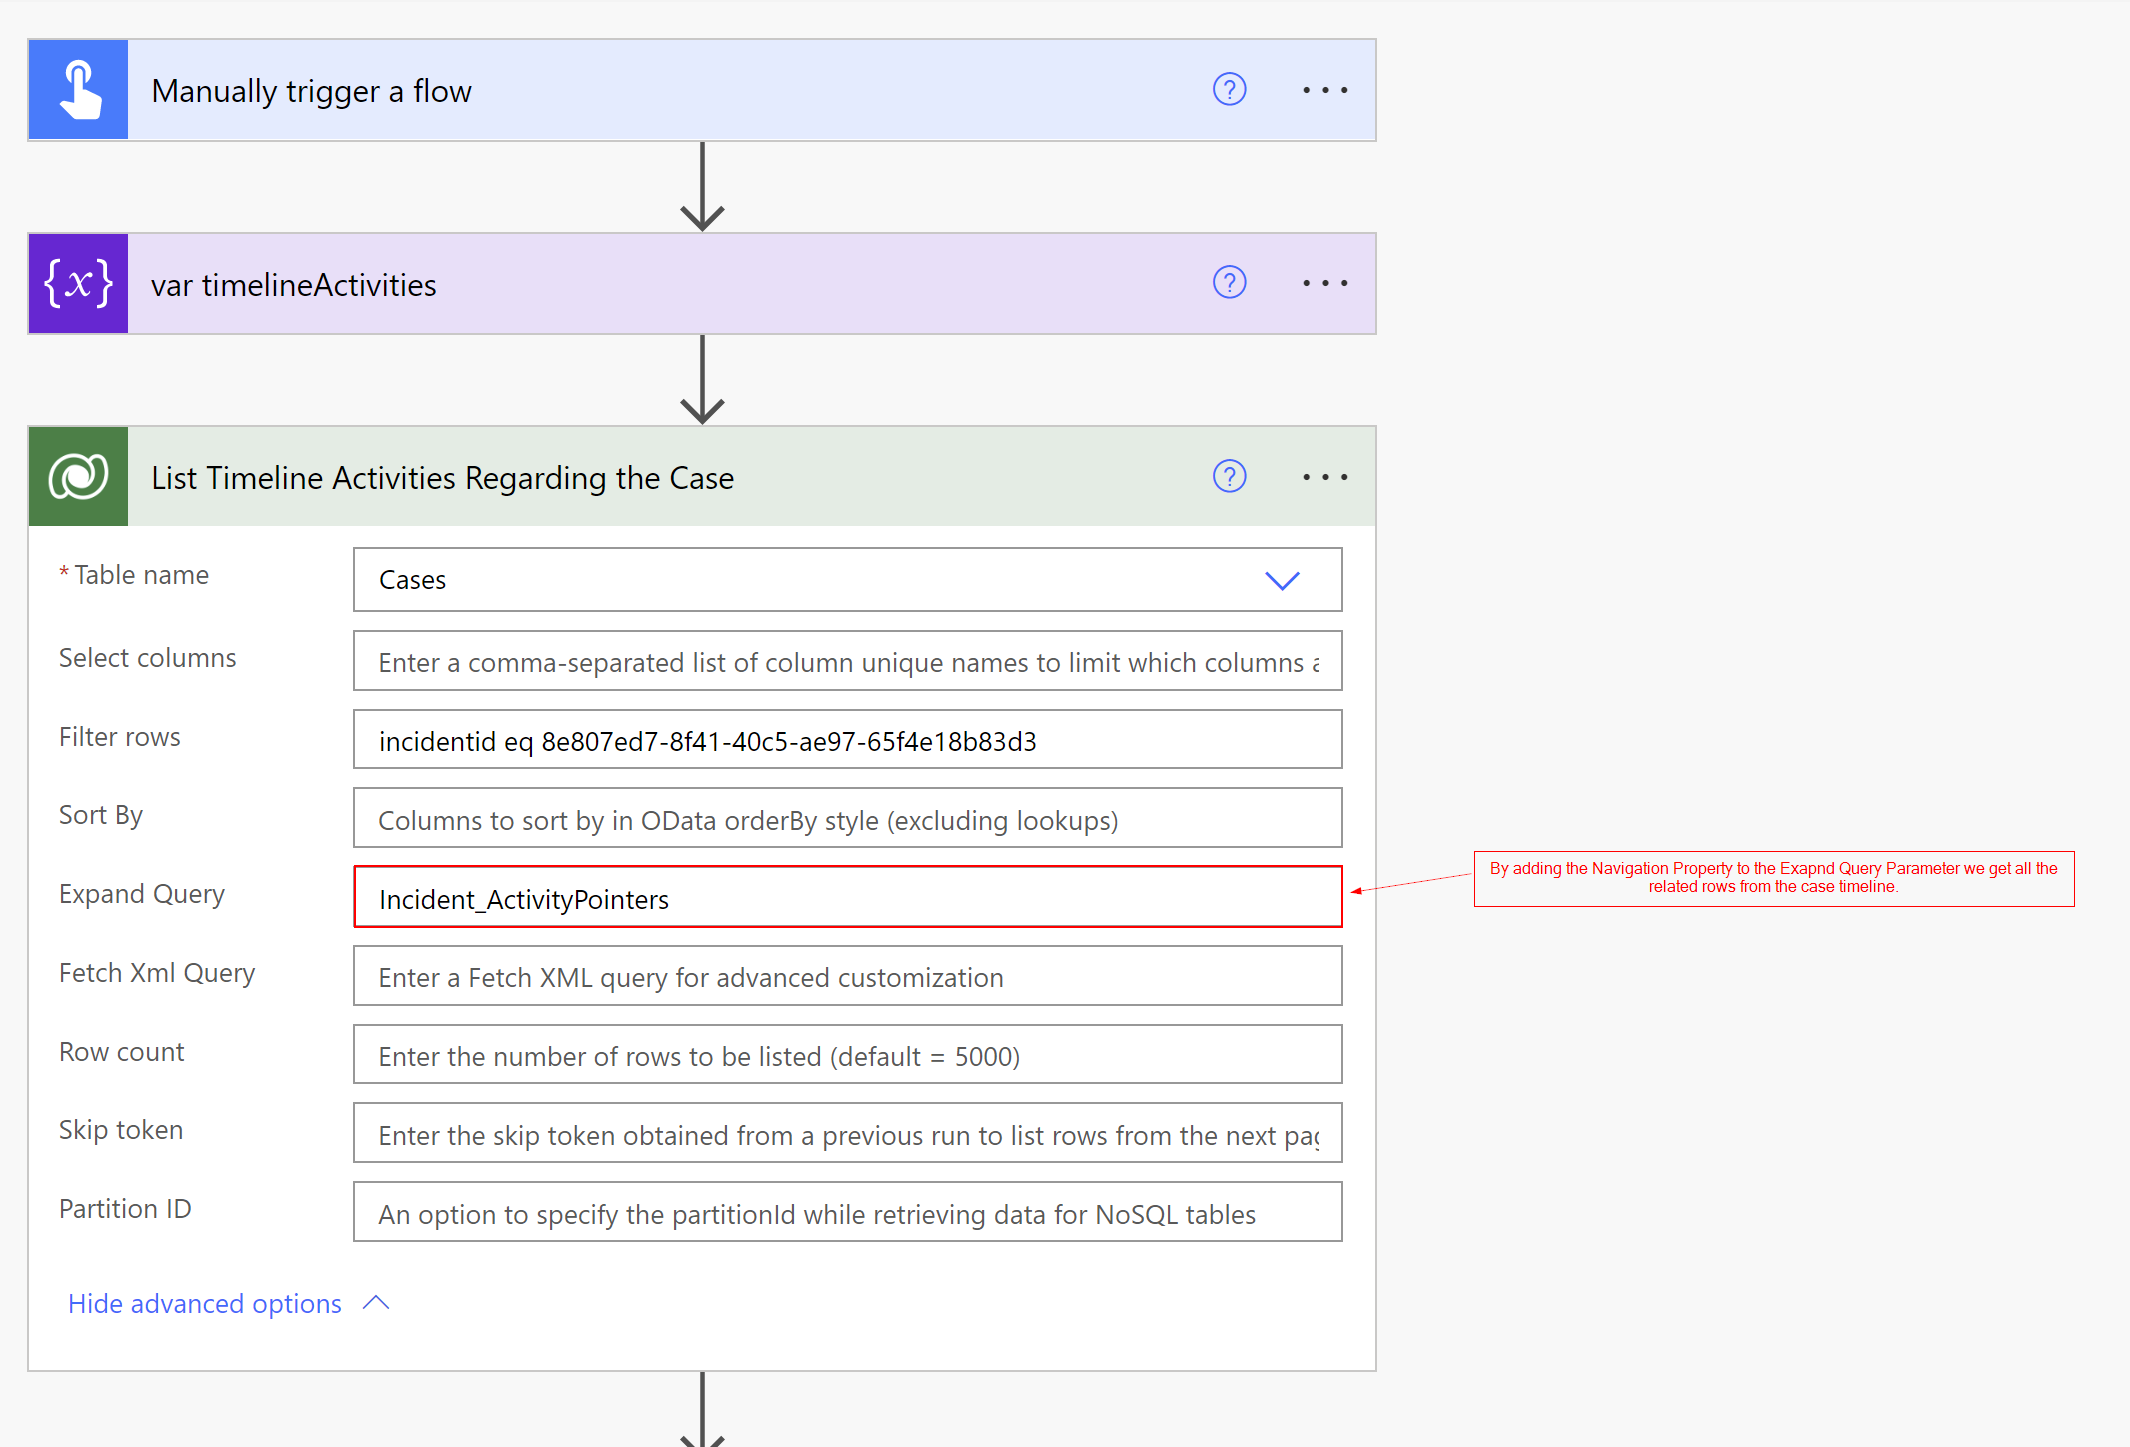
Step 5: After getting the Navigation Property to the Activity Pointer we use by adding it to the Expand Query parameter in the list rows action as can be seen in the image below.
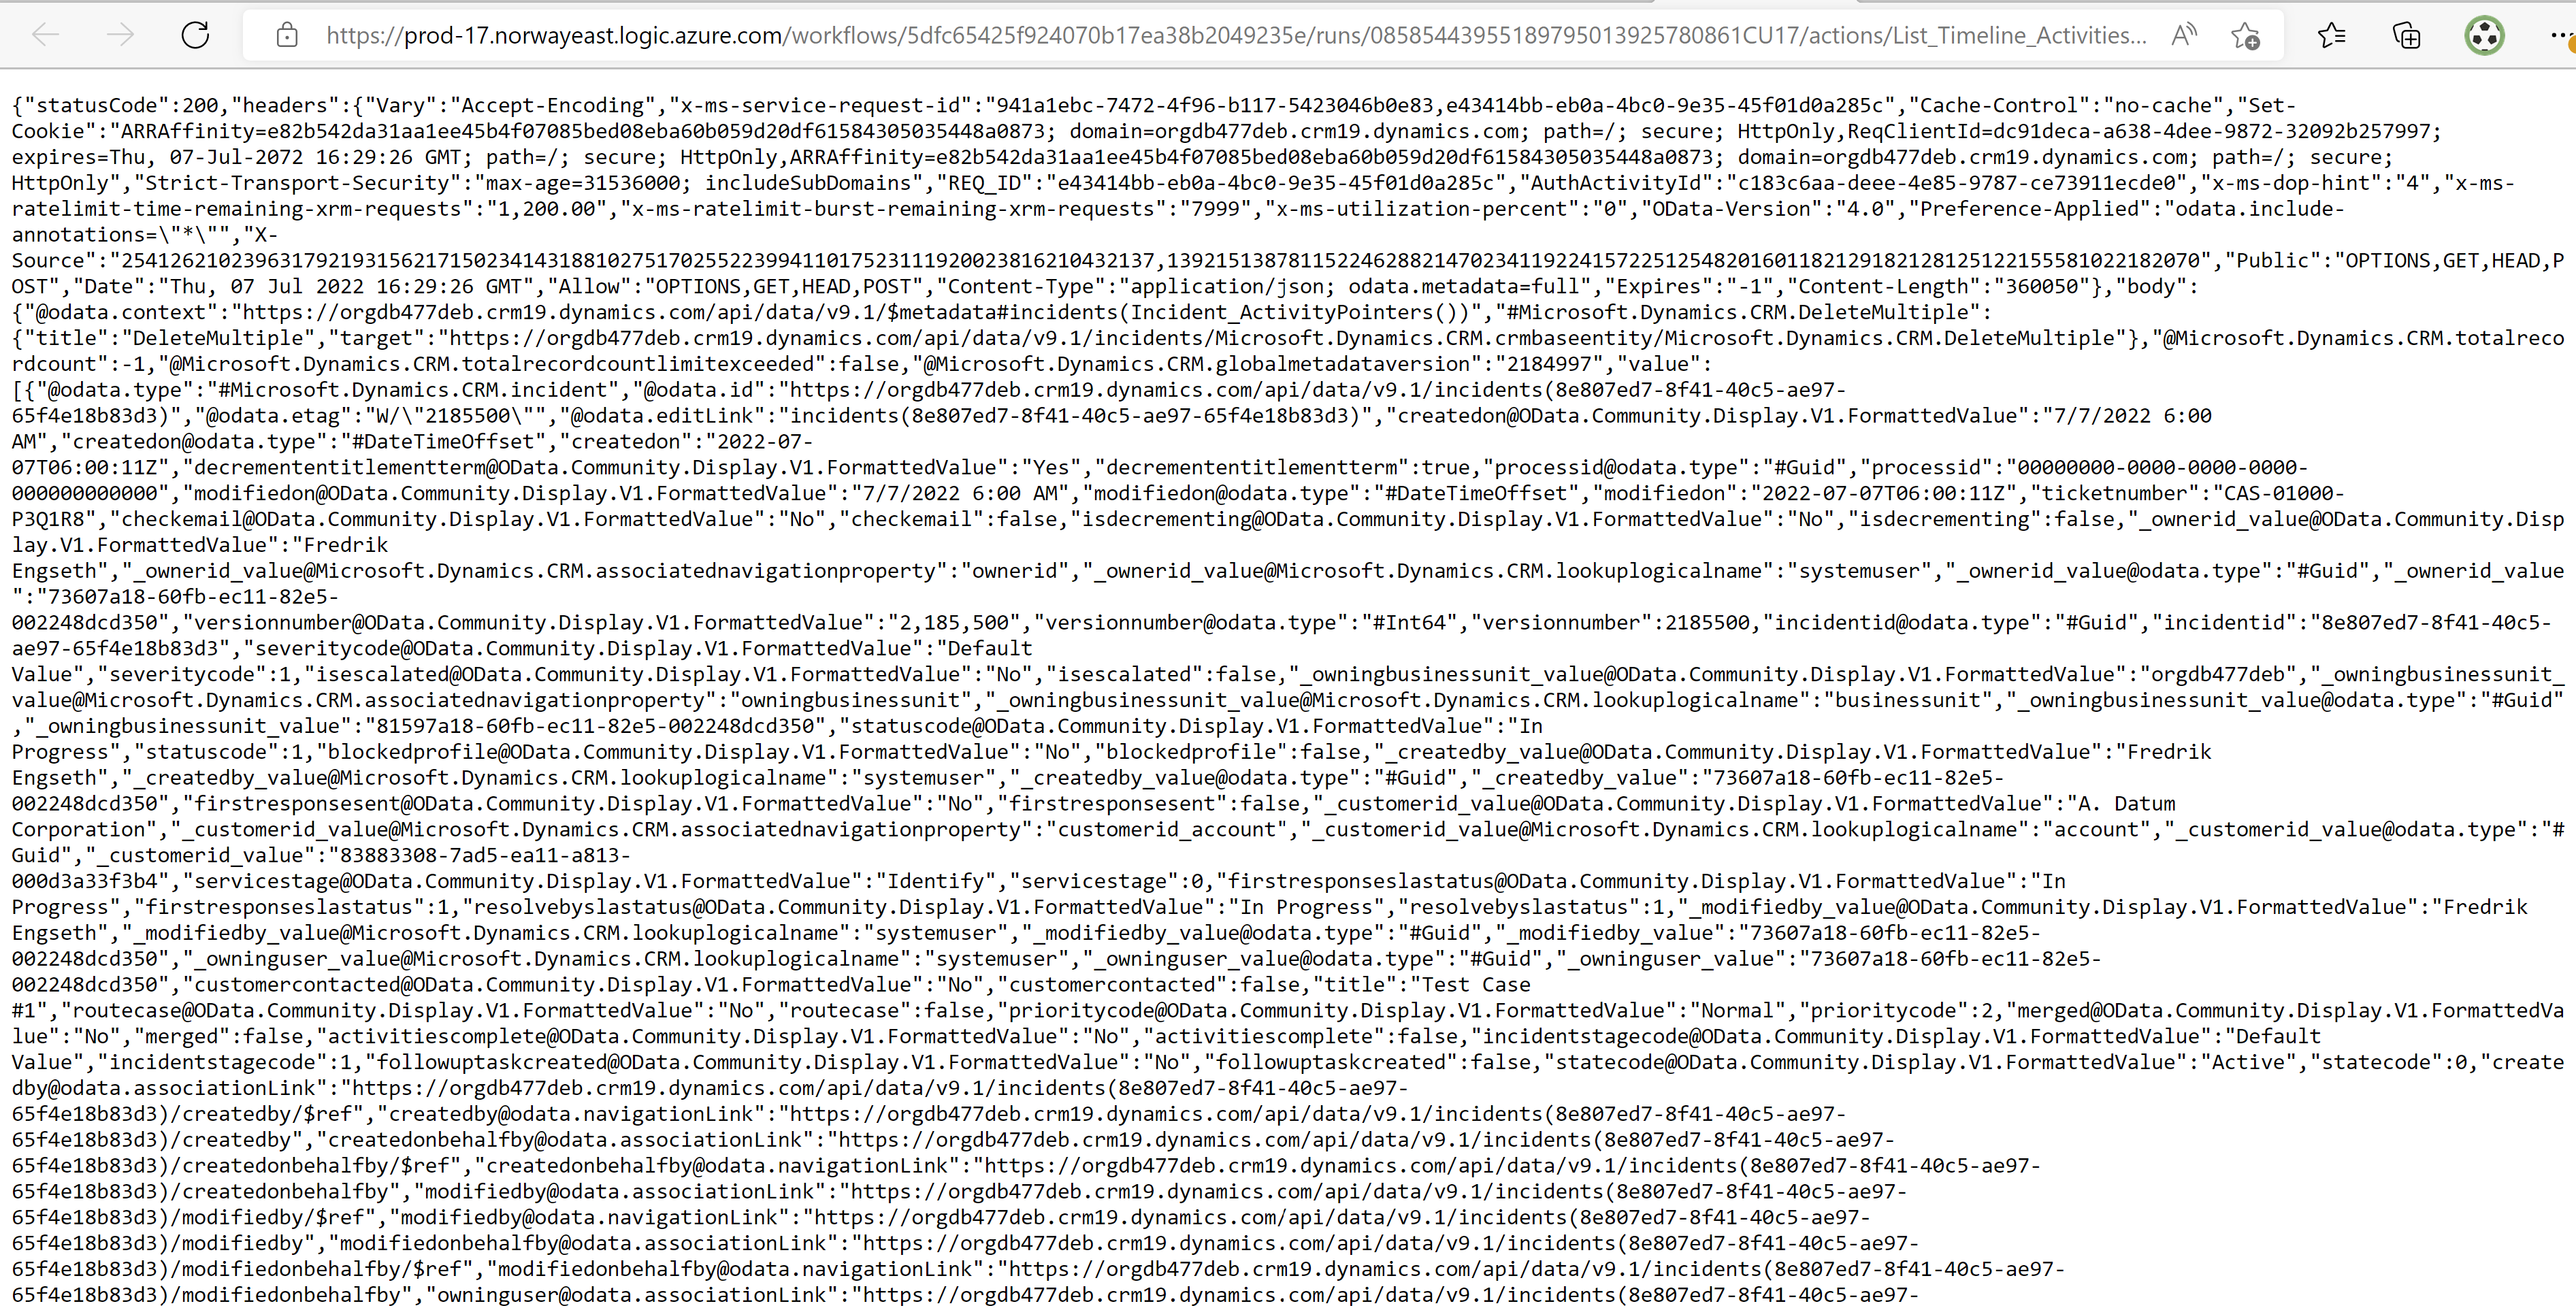
Step 6: After adding the Expand Query parameter the output from step 5 will output a large JSON object. To view it we need to open the output in another tab by clicking the Click to Download button. This will open another tab like the images below shows.
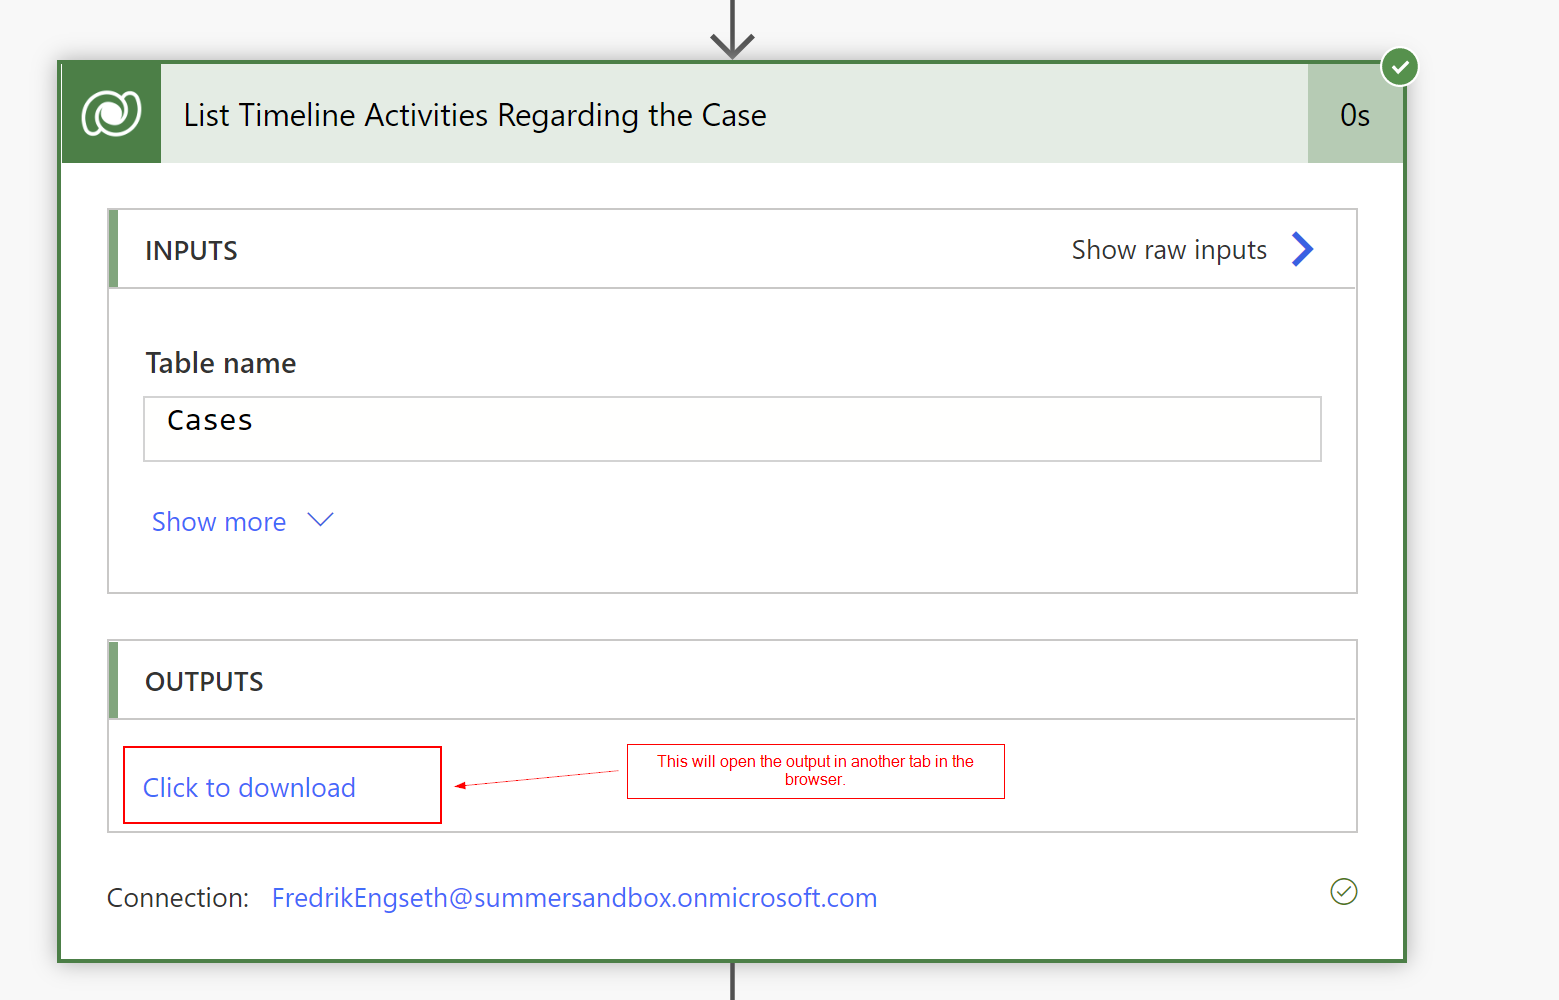
The Click to Download opens the output in a new tab like the image below. This isn’t easy to read or find data very easy. So if we copy this and opens Visual Studio Code we can format it and it looks better.
Step 7: To format the output we can do the following:
Open Visual Studio Code > Copy the output from the browser tab > Open a new file in VS Code > Paste the output > Click on SHIFT + ALT + F to format the document and it will look similiar to this (hopefully).

Step 8: In Visual Studio Code, search for or scroll down until you find the Incident_ActivityPointer property and you see that this is expanded with the related activities to the case.

Step 9: To get a cleaner output we can use Select Columns to get only the columns that we want. In this example we just use a few columns like incidentid, description and title for the case entity, and for the Activity Pointer we need subject, createdon and activitytype. This will give a cleaner output when running the flow.
To do this we can select the columns by using the Select Column parameter for the Case table and by using a Odata $select query within the Expand Query like below.
Incident_ActivityPointers($select=subject,activitytypecode,createdon)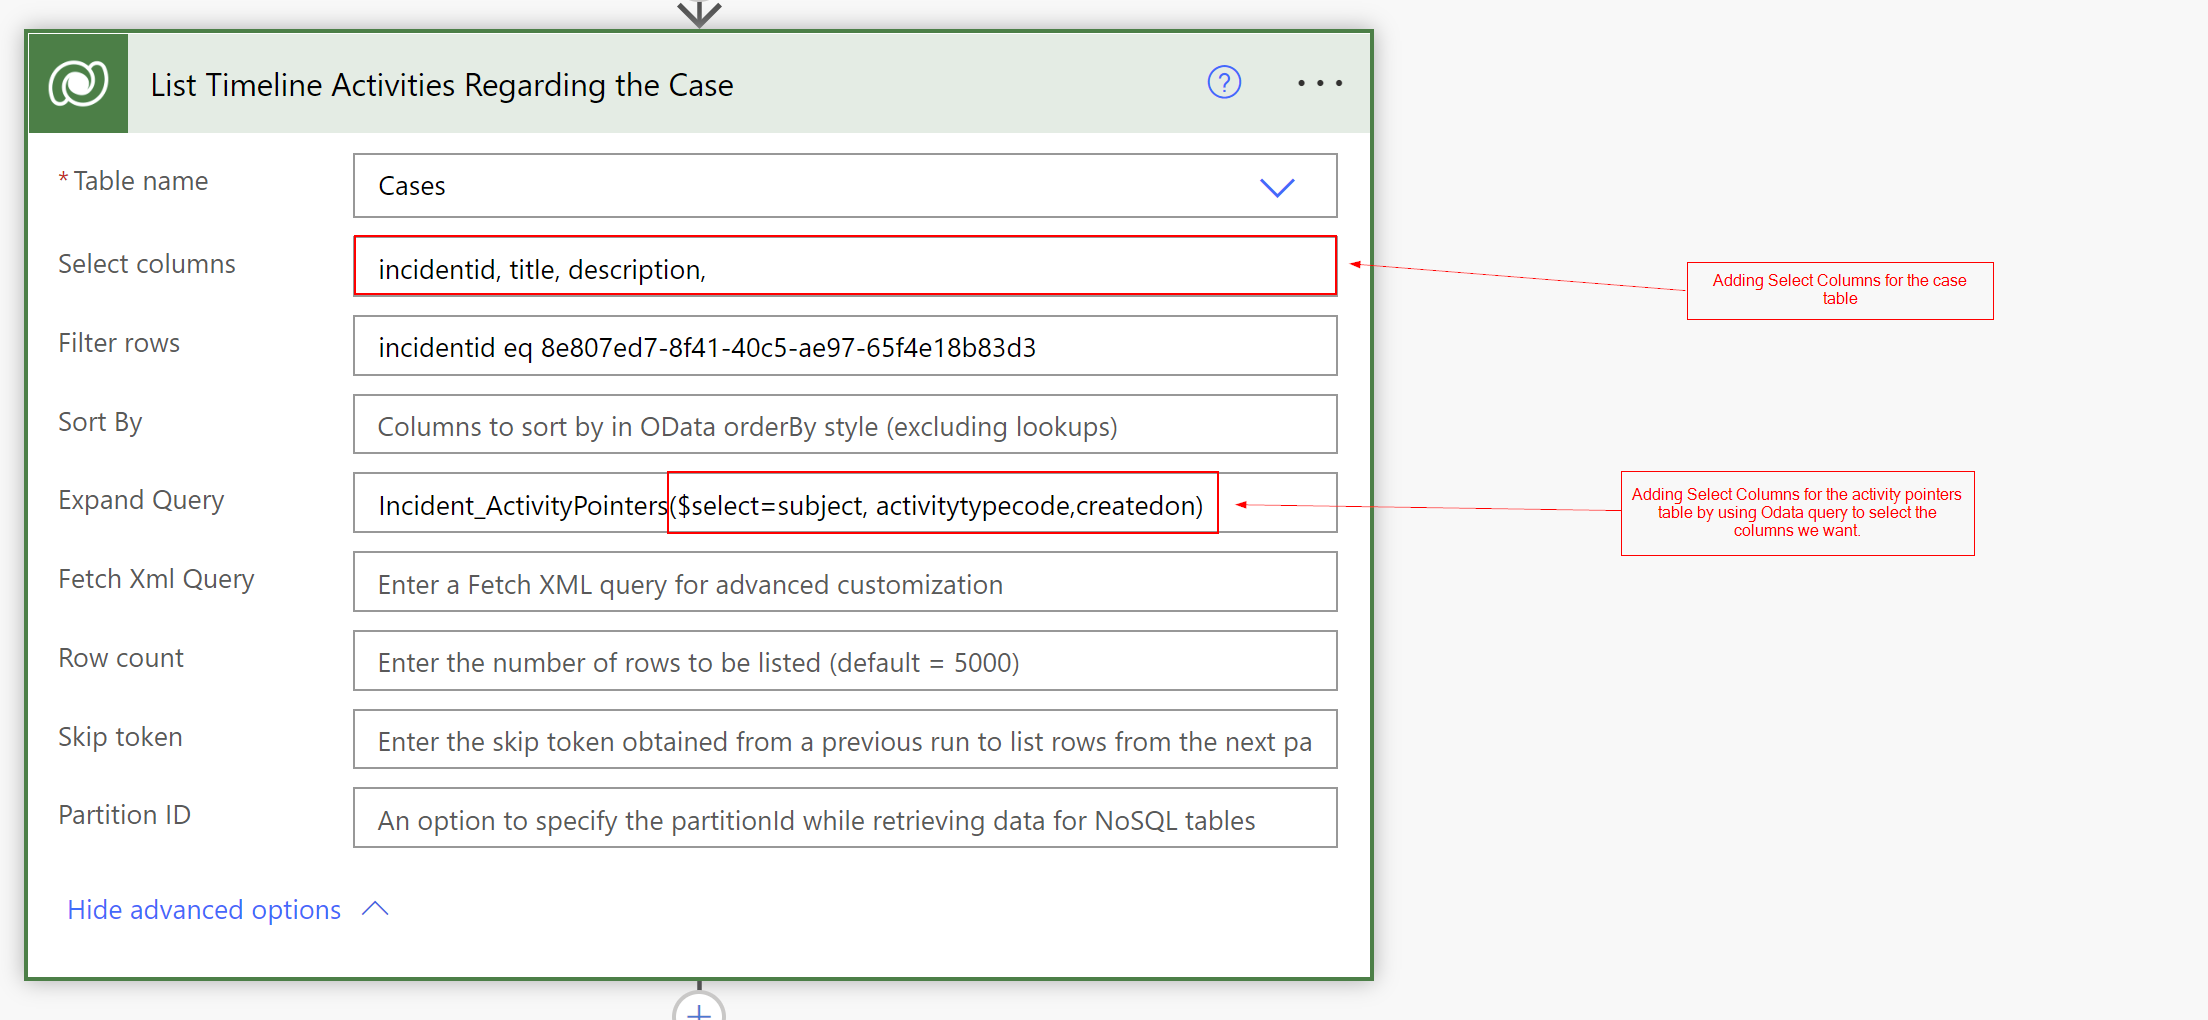
This will output the following after we selected the columns from above.

Step 10: So, now that we have the columns and rows that we want to list we can continue with looping through the related activites and adding them to the timelineActivities variable.
To loop through the Activities we need need to access the Incident_ActivityPointers array and we can do this by adding the expression below in the input field of the Apply to each action like below.
outputs('List_Timeline_Activities_Regarding_the_Case')?['body/value'][0]['Incident_ActivityPointers']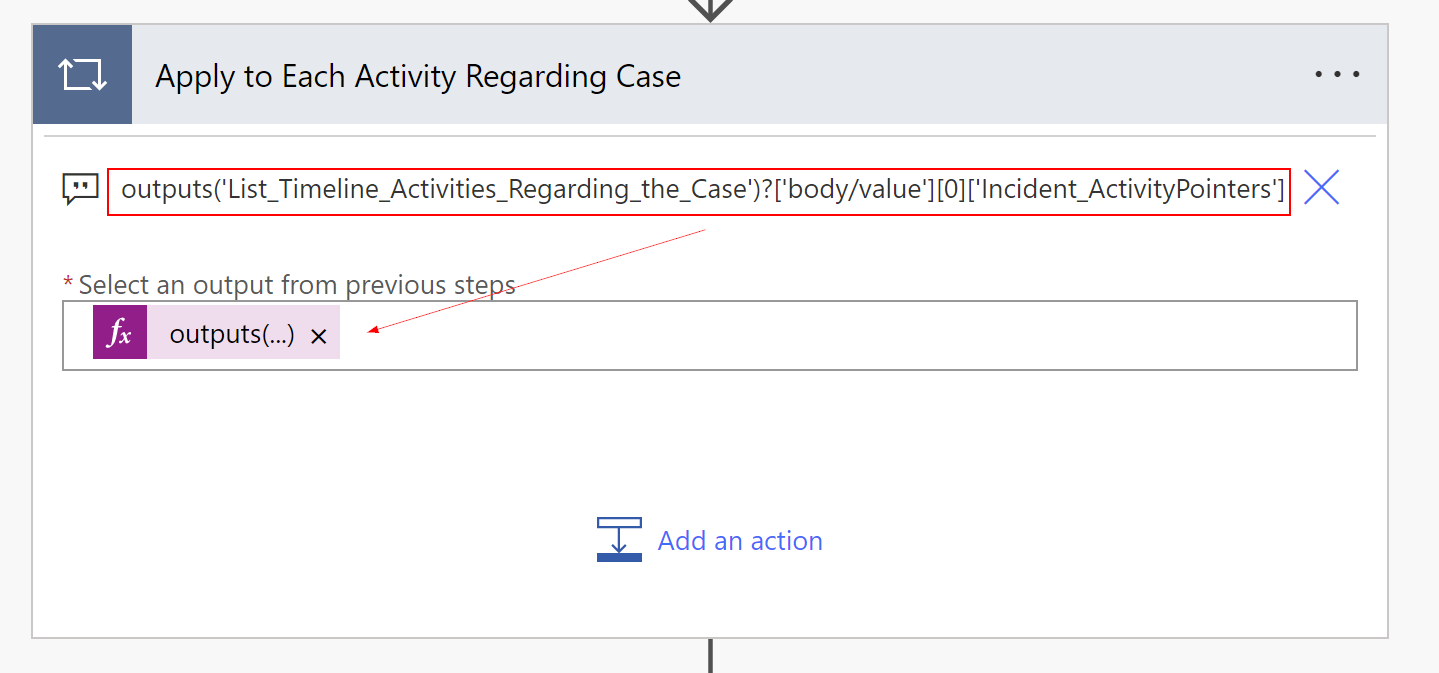
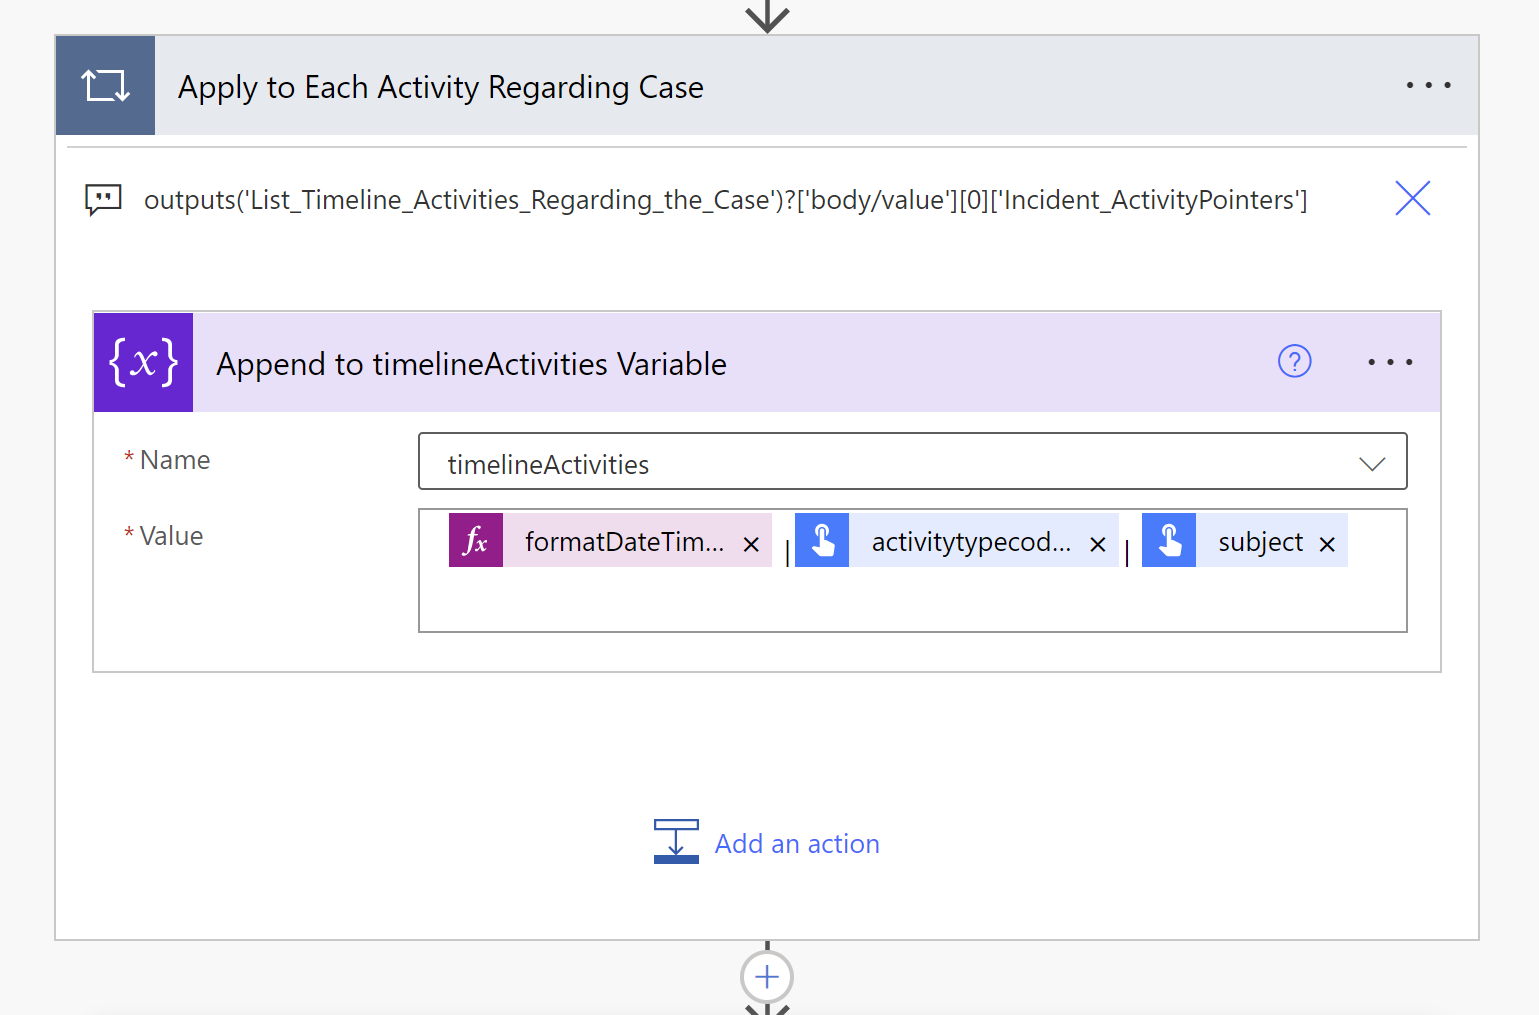
Step 11: Next we want to add the related activities to the timelineActities variable. To do this we use the Append to string variable action inside the apply to each loop and for each activity the variable gets updated. To access the column values from the related activities we can use the expressions below.
The first one uses formatDateTime expression to format the default date format to a more readable format.
formatDateTime(items('Apply_to_Each_Activity_Regarding_Case')?['createdon'],'dd.MM.yyyy hh:mm')

items('Apply_to_Each_Activity_Regarding_Case')?['activitytypecode@OData.Community.Display.V1.FormattedValue']

items('Apply_to_Each_Activity_Regarding_Case')?['subject']
The variable can look like the image below. The format in the variable is as follows in this example: createdon | activitytypecode | subject (followed by a return, to get each new row on a new line).
Step 12: Now that we have most of the flow in place we can add a Compose step to see the output from the variable.

After testing the flow it will output the following in this example.

Step 13: Now that we have a working flow that lists all the activities related to the case. We can now look at how to limit the amount of actions that are listed from the related table. We can do this by adding a new query inside the Expand Query parameter in the list rows action. Like below.
Incident_ActivityPointers($top=3;$select=subject,activitytypecode,createdon;$orderby=createdon desc)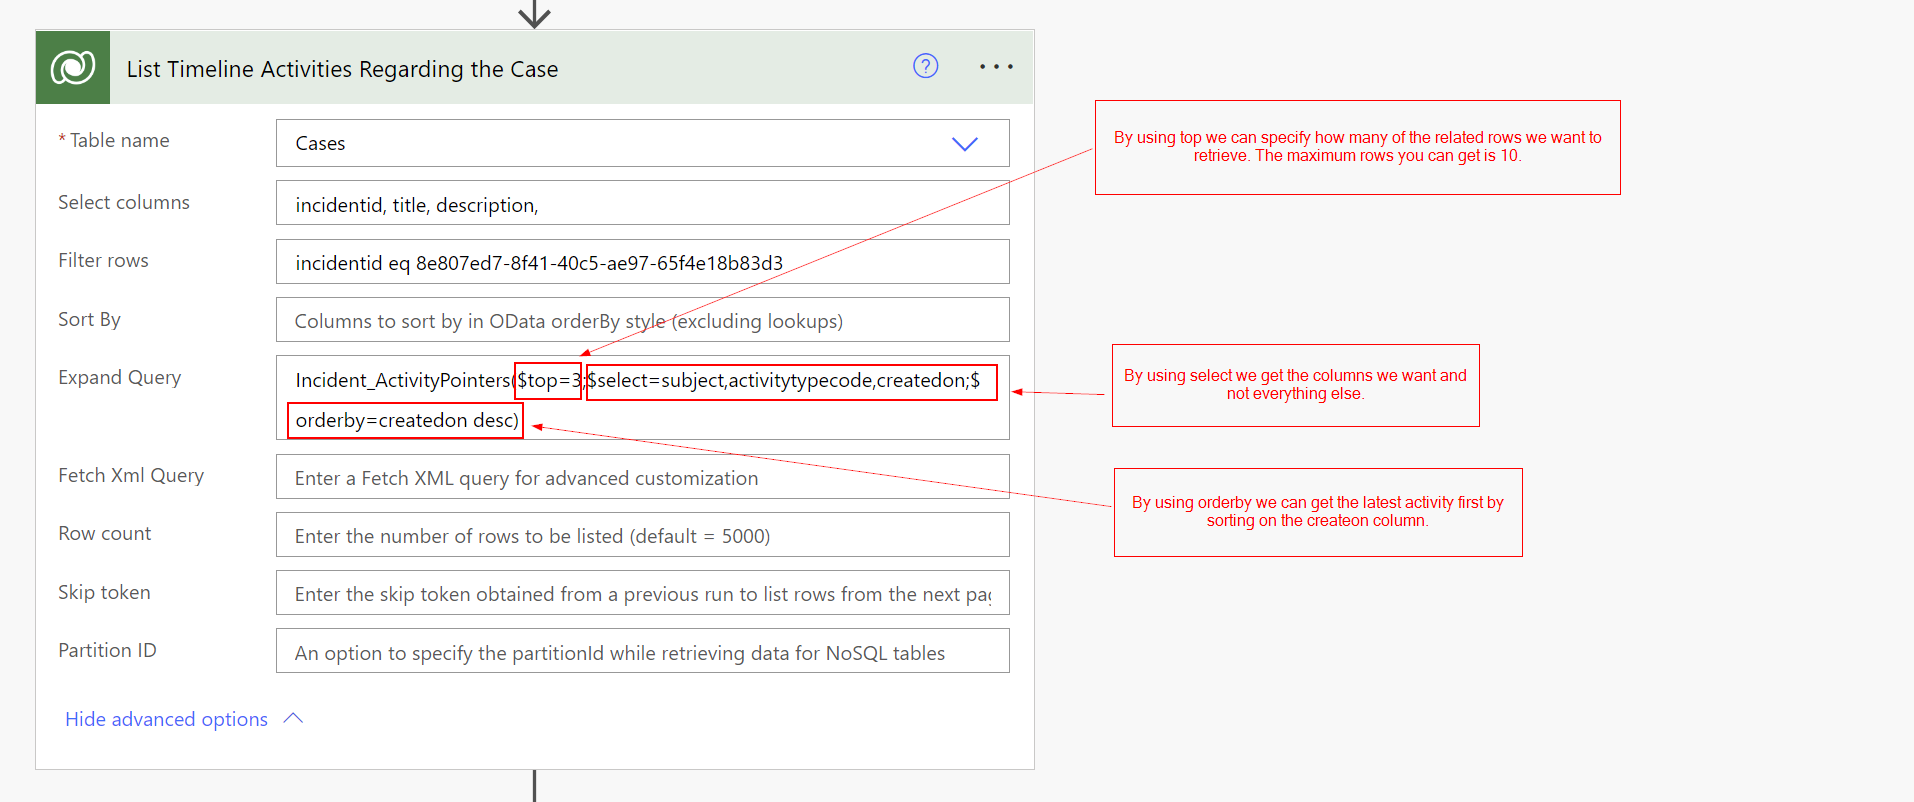
After we added the changes to the Expand Query the flow outputs the following:

Conclusion
Now we have listed the number of related activities we wanted and in the right order. Hope this example was useful and can be used to solve some needs and wants. For more information about the Expand Query parameter in the Dataverse action feel free to check out this post also, Using Expand Query in Power Automate with Dataverse.
This wraps up the post. Hope you found it useful🤓
For More Content See the Latest Posts
- Speeding Up Power Automate: Replacing ‘Append to Variable’ with ‘Compose’ for Efficient Workflows
 Discover how replacing ‘append to’ variables with ‘compose’ actions in Power Automate can drastically speed up your flows.
 - Why and How to Implement DevOps?
 Discover how to implement DevOps for faster software delivery, improved quality, and better team collaboration.
 - Quick Tip: Show and Hide Option Set Options in Dynamics 365 with JavaScript
 Learn to dynamically manage Option Set options visibility in Dynamics 365 forms, enhancing UI and user experience in just a quick read.
 - Understanding Dynamics 365 Customer Service Components: Key Features and Benefits
 Learn the concepts of Dynamics 365 Customer Service: Boost satisfaction with case management, knowledge bases, and multi-channel support.