
Introduction
Have you ever accidentally triggered many Power Automate flows or have many flows running at the same time that don’t complete since it’s waiting for another flow to finish? In this post, we take a look at how you can cancel running Power Automate flows with JavaScript. Instead of manually canceling one flow at a time, the JavaScript code performs these steps for you.
Table of contents
- Prerequisites
- Setting up an environment
- Creating a Power Automate flow
- Start multiple flow runs
- Run the JavaScript code to cancel the running flows
- Conclusion
Prerequisites
- Familiar with Power Automate.
- A Power Automate license or a Dynamics 365 environment or a trial.
- You have a Power Automate with multiple running flows.
- Some knowledge about JavaScript and the developer console in the browser.
Setting up an environment
To create a Dynamics 365 CE trial environment you can follow the steps in the post, How to create Microsoft Dynamics 365 Customer Engagement Trial instance?.
Creating a Power Automate flow
To show how to cancel flow runs with JavaScript we need to create a flow to show how it looks. To create a flow that we test upon following the steps below.
Step 1: The first step is to create a new cloud flow. For this example, we create an Instant cloud flow so that we can trigger it manually. In this example, I have a solution called Power Automate Flow where the instant cloud flow is added. To create a new flow proceed with the steps in the image below.

Step 2: After the proceeding steps are completed, a dialog opens. In the dialog give the flow a name and choose “Manually trigger a flow” and then create. This takes as to the newly created flow. To save the flow an action must be added to be able to save it. We add this in the next step.

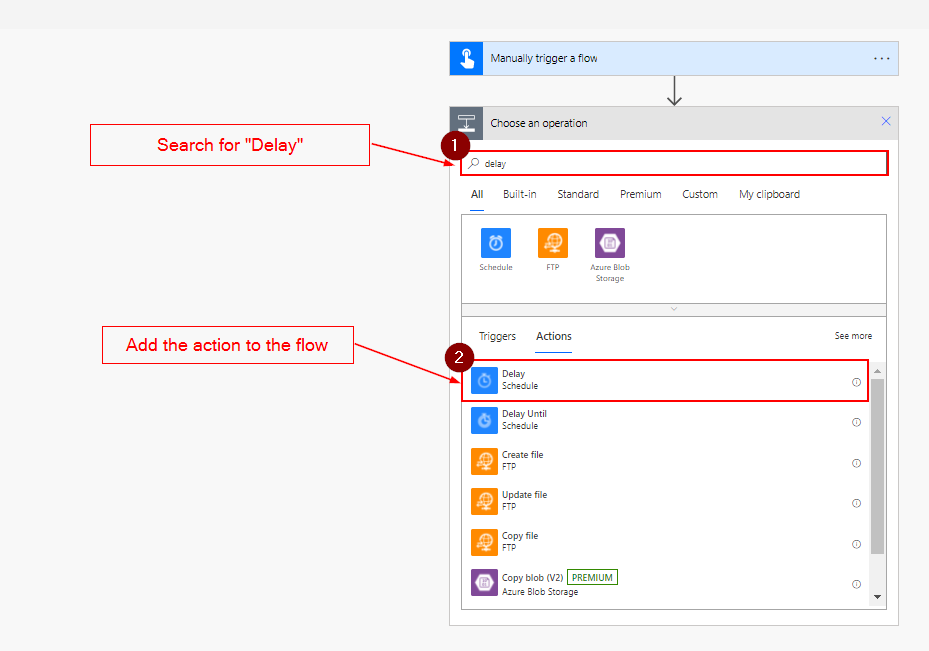
Step 3: For demo purposes and the simulation of multiple flows runs, we create a simple flow that only contains a delay action. We can then start this flow multiple times before it finishes.
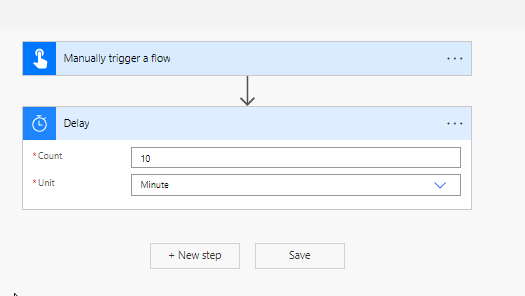
After adding the delay action, configure it to delay for 10 minutes. This gives us plenty of time to test the cancellation of multiple flow runs. Remember to save the flow for it to be created.

Step 4: This completes the flow in this example. Next up, we need to start the flow multiple times.
Start multiple flow runs
Now that we have created a flow for this example we need to start it multiple times. This can be done by following the following steps.
Step 1: Open the flow without going to edit mode. As shown in the image below.

Step 2: Click on Run in the menu bar and then click Run flow in the side dialog as shown in the image below.


Step 3: Proceed steps 1 and 2 for as many flows as you want to run. As an example see image below.

Step 4: Now that we have multiple flows running we can now look at how we can use JavaScript to cancel them without doing it manually one by one.
Run the JavaScript code to cancel the running flows
In this part, we look at how we can use JavaScript to cancel flows that are running without canceling each flow manually. To do this, follow the steps below.
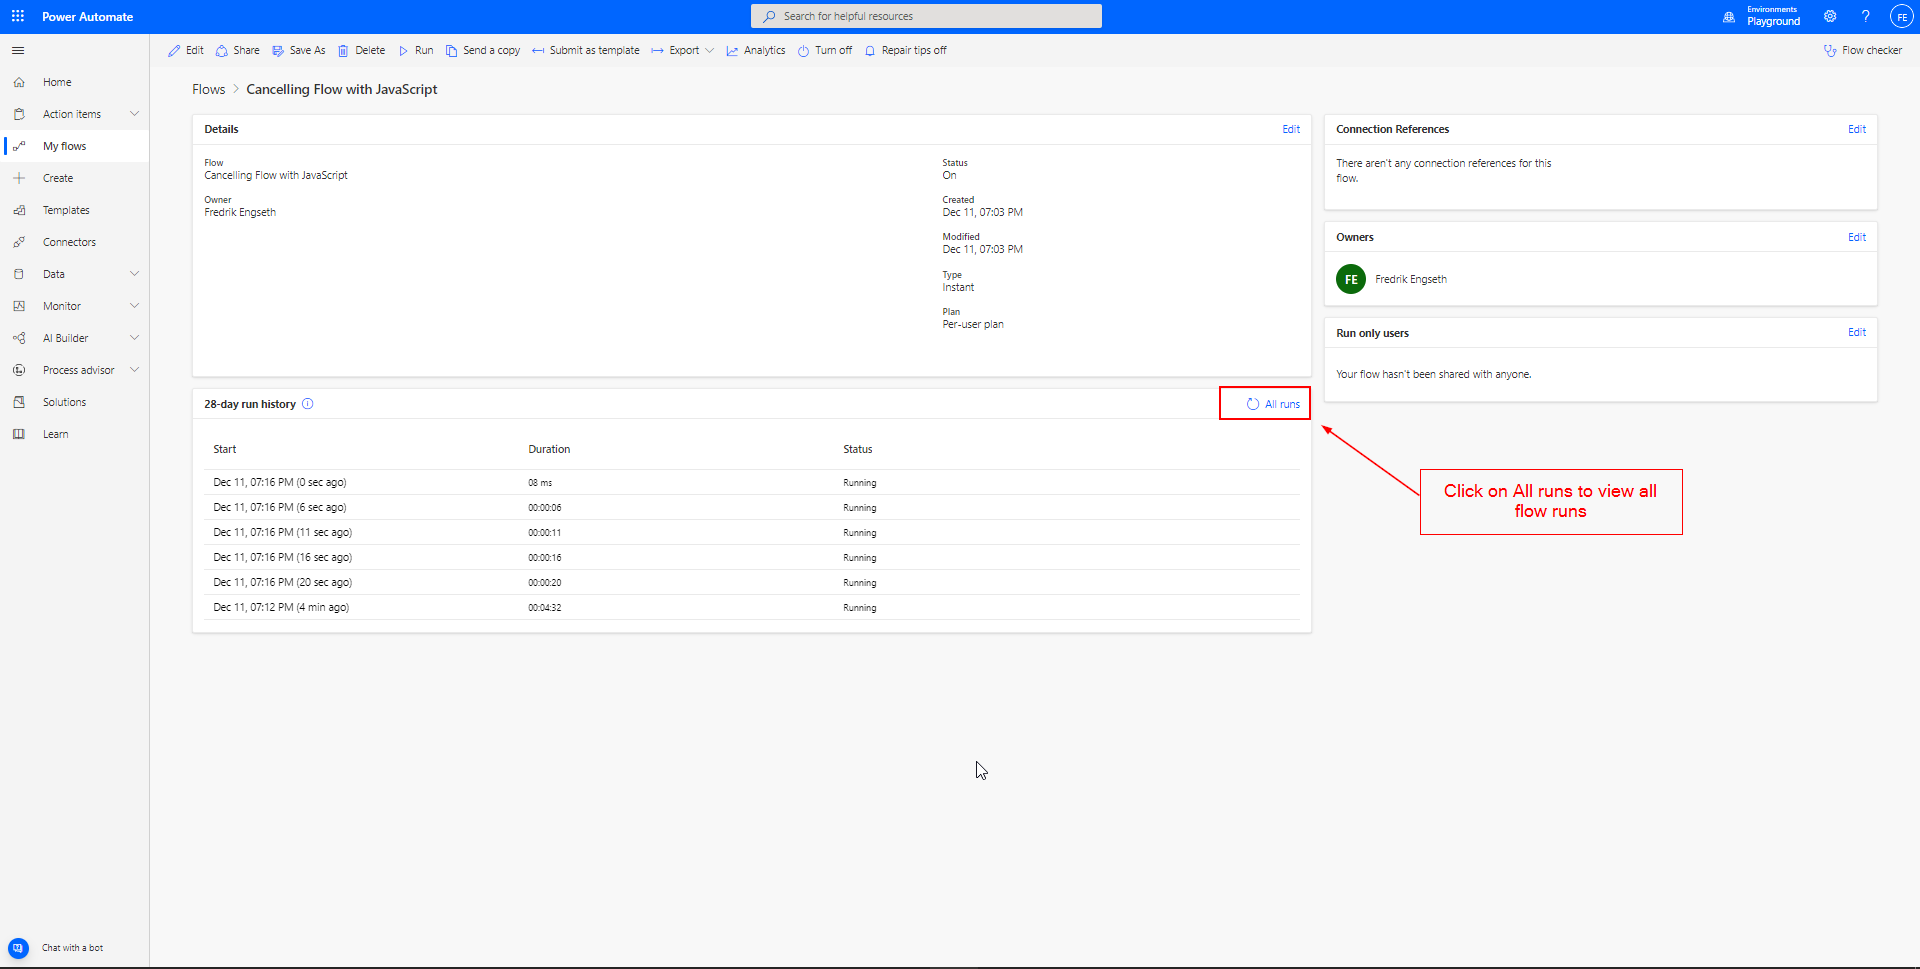
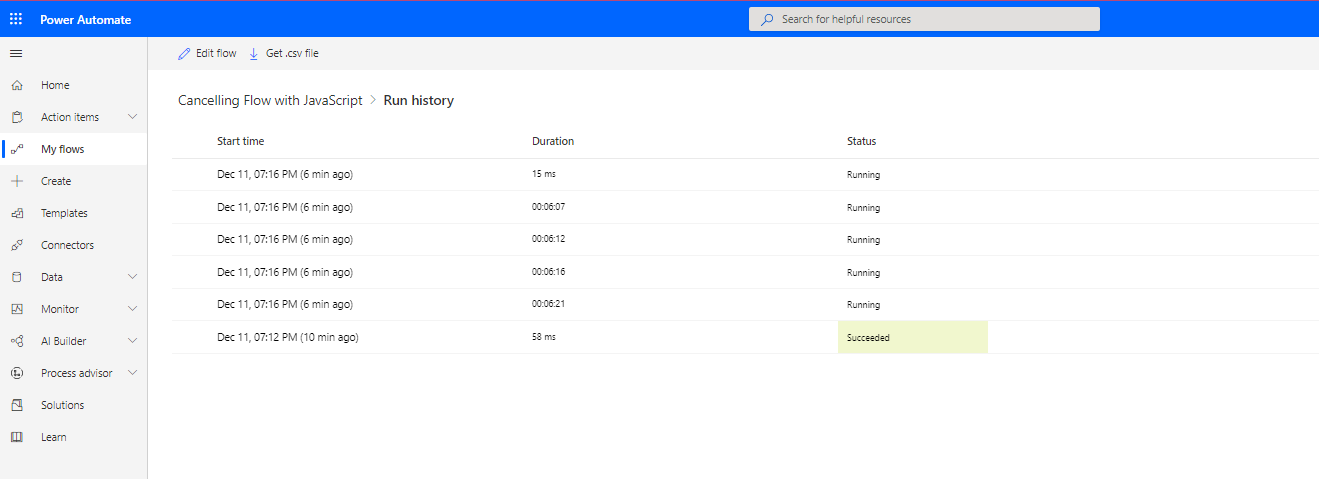
Step 1: Click on All runs, this navigates you to all flow runs view.
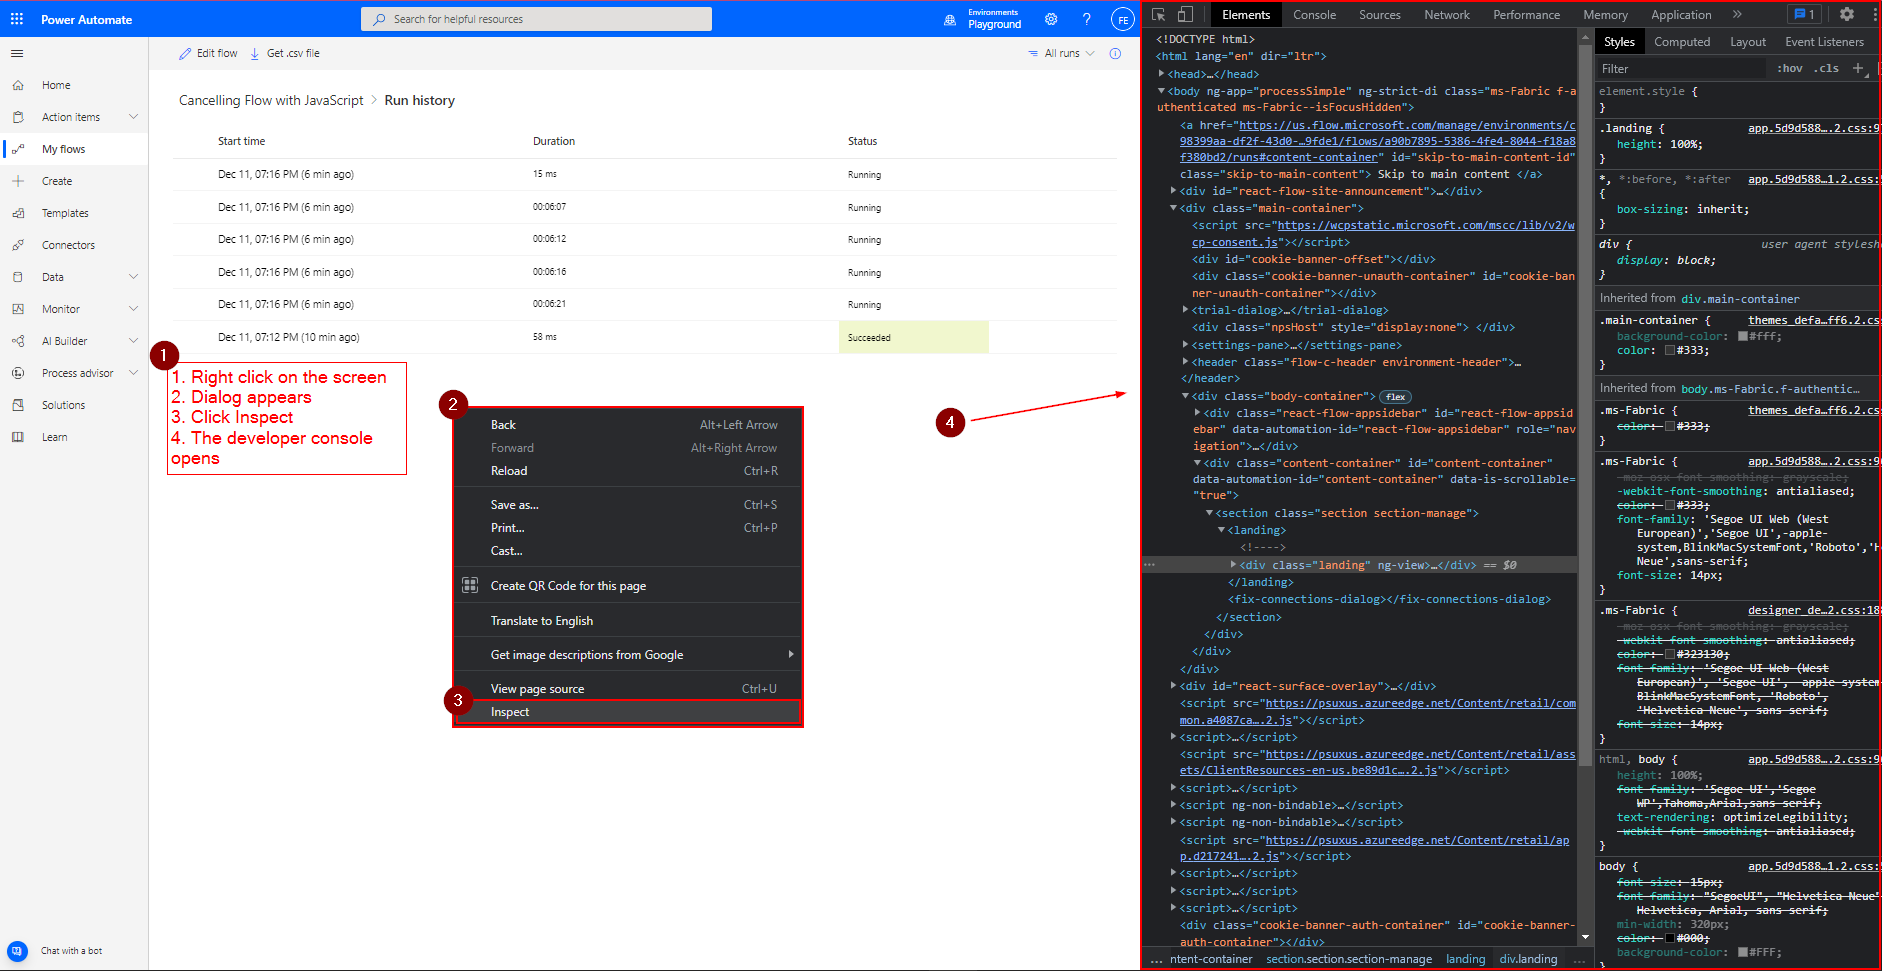
Step 2: When we are in the All runs view, we need to open the developer console in the browser. The developer console can be opened by clicking F12 (or holding fn and F12) on Windows. Or by right-clicking on the screen and clicking Inspect in the dialog as shown in the image below.
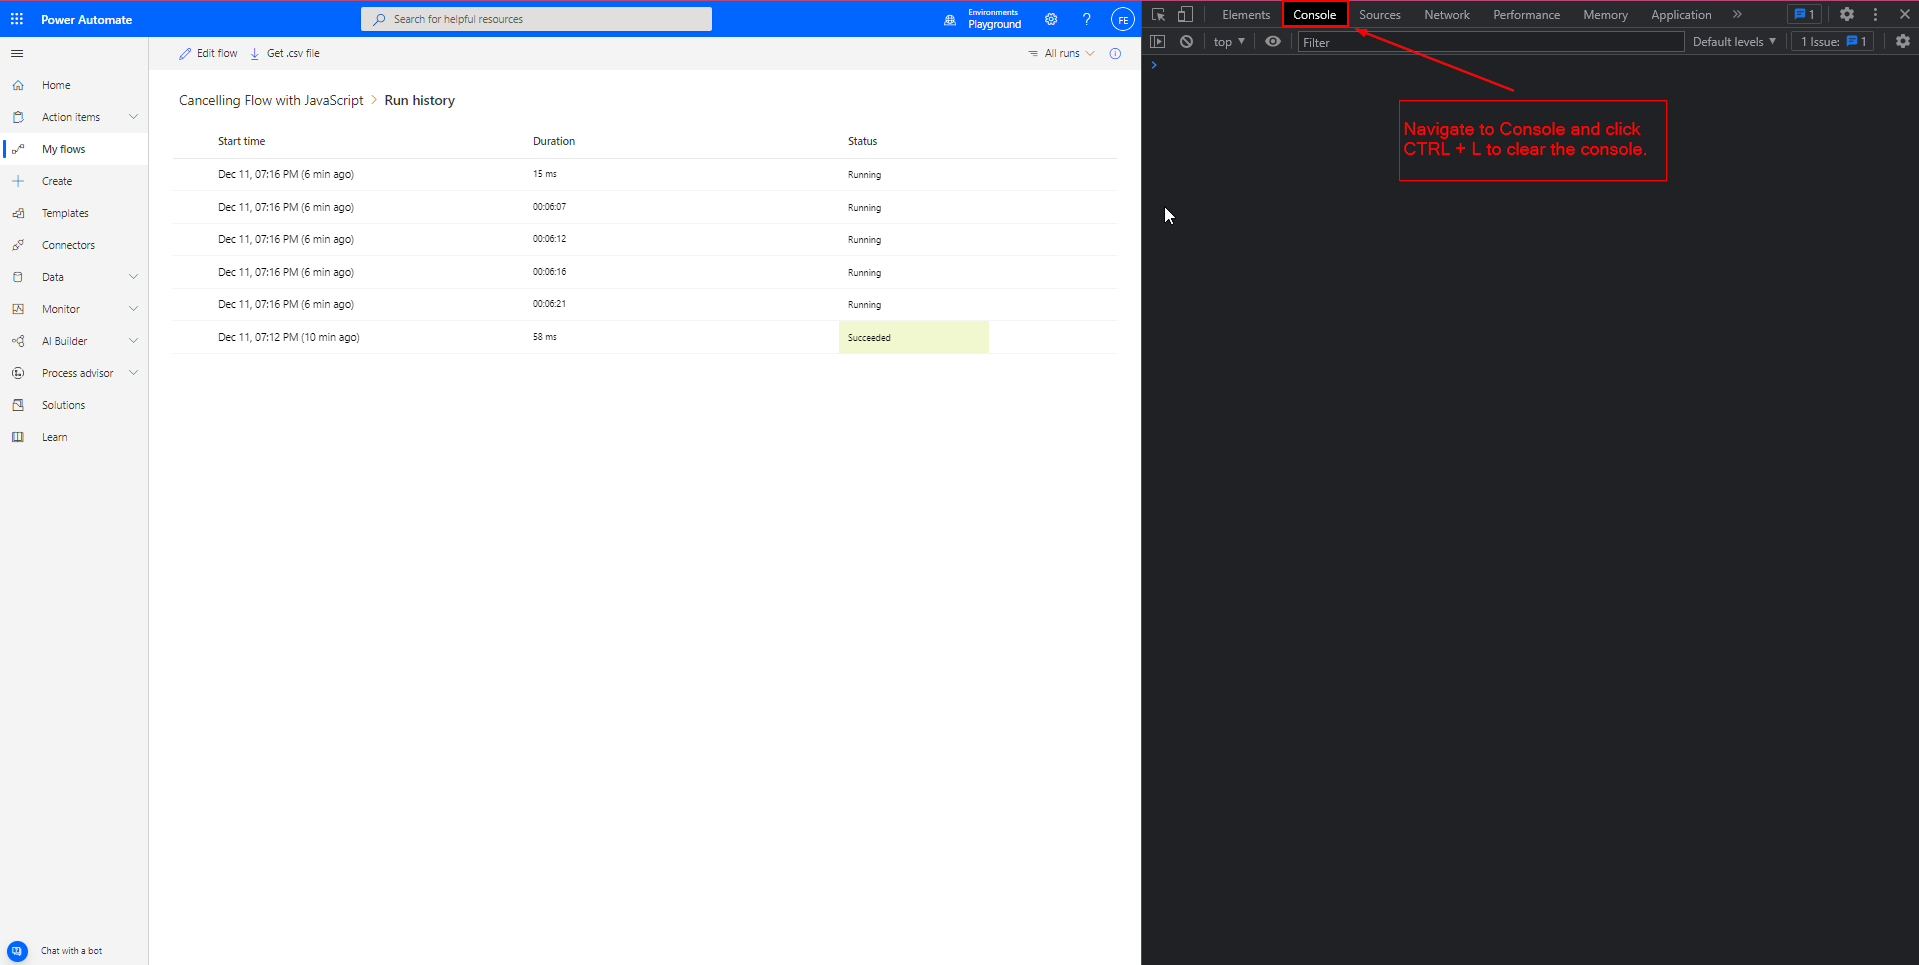
Step 3: In the developer console, navigate to the Console pane. To clear the console window click CTRL + L. The console pane is where we are going to add the JavaScript code that will cancel the running flows. As can be seen in the next step.
Step 4: The JavaScript used in this example is inspired by the community post, https://powerusers.microsoft.com/t5/General-Power-Automate/Cancelling-multiple-running-flows/td-p/94174 (link opens in a new tab). The code is the same as in the post, with a tiny modification. Instead of canceling the first row in the list, I changed it to cancel the last flow in the list.
Step 5: To run the script copy the following code. In the code block. Copy the first part and run this first, you will get and an error the first time and the second time it works. Then copy the other part, this will start to cancel the flow that is running. A gif of how it looks like is shown below the script.
// Copy this first and run it in the console
var jq = document.createElement('script');
jq.src="https://cdnjs.cloudflare.com/ajax/libs/jquery/3.3.1/jquery.min.js";
document.getElementsByTagName('head')[0].appendChild(jq);
// ... give time for script to load, then type (or see below for non wait option)
jQuery.noConflict()

// Then copy this in the console to start the cancelation of the flows.
confirm = function () {return true;};
setInterval(function () {
$(".fl-StatusInCell:contains('Running')").parent().parent().find('.ms-DetailsRow-cell').last().click();
$('button[name="Cancel"]').click();
},5000);
Step 6: To see how it looks when you are running the script you can see it in the gif below.

Conclusion
This wraps up the post, hope you found it useful. Another possible solution is if you have too many flows to cancel, there is a bit risky solution that works. Where you save a copy of the flow and stop the original and then start the copied flow, and then delete the original flow. This will remove all runs for that flow and the copied flow is the “new” original flow. On the other hand, if there is a fair amount of flow that must be canceled the JavaScript can be an easy solution instead of manually canceling each flow.
For More Content See the Latest Posts
- Speeding Up Power Automate: Replacing ‘Append to Variable’ with ‘Compose’ for Efficient Workflows
 Discover how replacing ‘append to’ variables with ‘compose’ actions in Power Automate can drastically speed up your flows.
 - Why and How to Implement DevOps?
 Discover how to implement DevOps for faster software delivery, improved quality, and better team collaboration.
 - Quick Tip: Show and Hide Option Set Options in Dynamics 365 with JavaScript
 Learn to dynamically manage Option Set options visibility in Dynamics 365 forms, enhancing UI and user experience in just a quick read.
 - Understanding Dynamics 365 Customer Service Components: Key Features and Benefits
 Learn the concepts of Dynamics 365 Customer Service: Boost satisfaction with case management, knowledge bases, and multi-channel support.